Did a gaggle of modelling, and a little bit of animation! I'm very excited with what I've done week, so enough preamble!
Up first, a little bit of a pendulum animation that I did. I want to try and post in here, but I'm not sure if it will work. I will edit the post elsewhere in case it doesn't. From what I've heard, it's a bit of a problem with other users and I'm not quite sure if it's been fixed yet. (Edit: It did not work.)
I didn't particularly put too much time into this animation, but I'm still proud of it. I have yet to have a search for a decent series of videos that help teach animation, but I'll get around to it sooner or later. I was more focused on finishing my post-graduation application last week. I'm very worried that I won't be accepted in. It might be the imposter syndrome, but I feel as though I don't have a good enough grasp of the basics yet. Fingers crossed that they might teach me some over at the course! I think that I might give animation a bit of a break for a few weeks, though. I got pretty stressed out from sorting out the application.
Some exciting news on my persona model that I'm working on! It finally has legs!
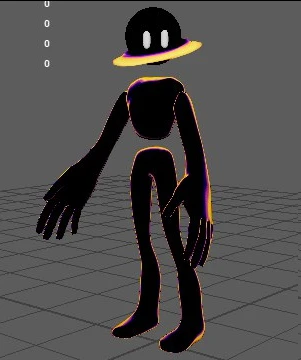
I am very happy with how the proportions are looking! The legs are from another base mesh in Maya that I just so happened to scale in just the right way. I quite like how the calves connect to the rest of the lower body. It really helps to add a nice silhouette and helps to make the appendages appropriately and consistently large. I reckon this part of the model is effectively done. I still need to rig it and make some expressions on the eyes, but that's for later. The next step of the process is to create an outfit for the model.
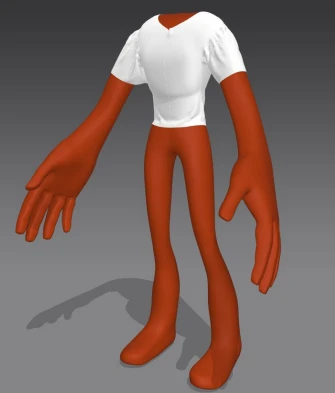
Which I have started messing around with!
This is a screencap of me figuring out the basics of a program that I'm using called Marvelous Designer. This will allow me to make a cool outfit without having to rely on poly modelling it all. I think I'm starting to get the hang of the program, so I think I will have something more substantial to show next week. Stay tuned for that!
Finally, I was able to submit my art for the Bzzt contest! If you'd like, check it out in my art section!
Working on the ZX8000 fan art was a blast! It helped me to re-accustom myself with working with a deadline and to finding solutions within a short time frame. I did not expect the amount of attention that it was going to get, though! The people commenting on the art are all amazing and had such kind words, which certainly made me feel fuzzy on the inside! The last thing I expected was to get Frontpaged! That came as a complete shock to me! I seriously did not expect it to get more than a few votes, but it was such an awesome surprise! Congratulations to everybody who submitted something and congrats to whoever wins! As of writing the winners haven't been announced, but congrats to whoever they are!
As a little thanks, I'd like to share the creation process of making the model!
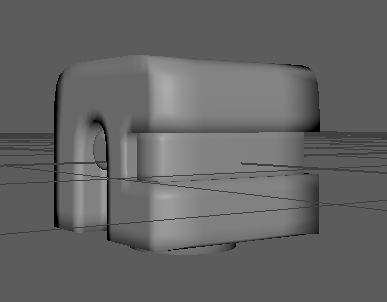
First off was the head. Making it was surprisingly easy. I would attribute that to how I go about making edges. Instead of making loops around the model to make sharper edges, I would simply use the crease tool in Maya to get a curvature that I liked. This is basically the same feature as edge creases for Blender users. This allowed me to alter the curves if I wanted to with a non-destructive workflow. This meant that I didn't have to go through the hassle of retracing my steps and getting all the loops and vertices gone before making another loop. I have another model on an indefinite hold that could use some crease tool TLC....
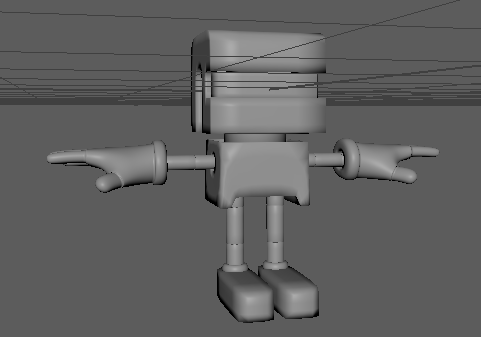
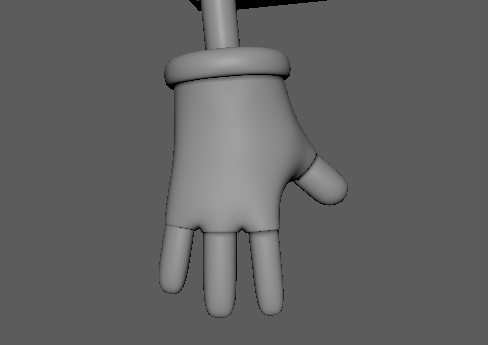
Fast forwarding a bit, here's the model with it's original hand look. The hands we're from an alien arm base mesh that I fidgeted with and messed around with until I got a half decent result out of it. However, it was at this point during the creation process that I came to realise something: I absolutely would not have any time to rig the model at all. Upon having this revelation, I knew that I had to change how the hands looked. I would not be able to pose the hands in an efficient way if they remained the same. I then started to experiment with some different hand shapes, and started to put the toon shader onto the model. Hand experiments included: Wavy box with tube sticking out of it and box with really gross looking fold on the fingers.
(Pictured below: Aforementioned wavy box with tube sticking out of it)
This was also the point where I started to pose the model. Luckily, I don't need to rig anything to be able to move things around. A large majority of the model are separate parts, allowing for easy adjustment. I went for a simple hands on the hips with feet facing outwards pose in the final thing.
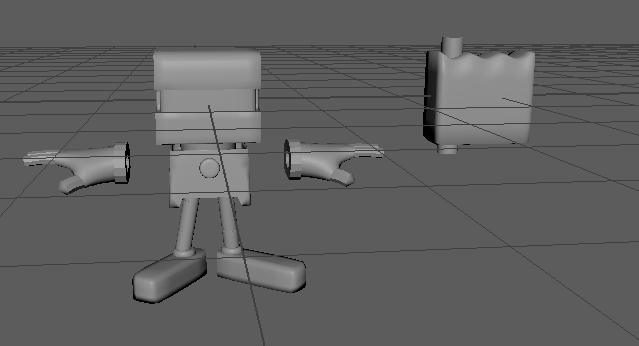
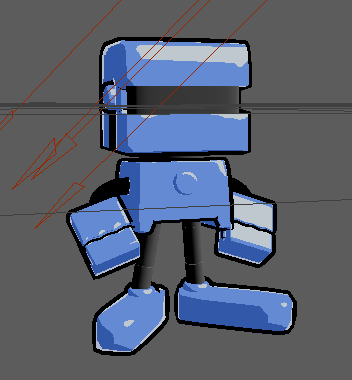
I eventually plugged in the shader for the model and started to get the arms in the correct position. The shader is relatively intuitive to work with. A feature that I quite like is the ability to assign certain instances of the shader to specific lights in the scene, allowing me to alter the direction for specific parts of the model without affecting other parts. One gripe that I have with the shader is that the outlines are annoying to properly incorporate into a render. When the model moves around, something happens to the outline and it becomes warped. I was thinking of having a turnaround for the model, but I was tired and didn't want to make my own nice looking outlines, so I stuck with a single frame. Curving the arms was also a bit of the challenge, but it became pretty easy once I found the solution. At first, I tried just moving the vertices about to bend them. That was a hassle, though, and would cause some annoying deformation in the mesh that I didn't like. But after remembering Maya's lattice deformation, it became a lot easier. It basically just envelopes the mesh in a box with movable points that can shift the verts on the mesh in a more intuitive way. After getting through that, I simply fixed up the colours on the model, added the eyes, and put a nice background on it.
I think the length of this post more than makes up for how short the one the week before was! Once again, I would like to thank all the people who commented on, voted, added to a collection, or simply viewed my artwork! It really does mean a lot to me.
Thank you and good-bye for today!